Here’s a little secret: Top designers have their own portfolio websites. They know that it gives them a professional edge, and that it’s the best way to showcase their skills.
Find any designer working at a highly desirable company and you’ll find they have their own website, 9 times out of 10.
Have you ever wanted to create a site of your own?
Online design portfolios are the best way to stand out as a professional designer. Companies now expect top talent to have websites with branding and work samples (and you’ll stand out compared to designers with just a resume).
Even if you already have a great job, it helps get your work out there, and you never know what companies might reach out!
And if you’ll be applying for a a new role, it shows you’re serious about your work.
If it sounds tedious, I get it. But here’s the thing: it doesn’t have to be.
How?
WordPress! Yep, it’s what this site is running on now. 🙂 The best part about it is that no coding is necessary. With the power of WordPress, you can create a site in under a day. No need to hire a developer.
Imagine waking up tomorrow having a totally amazing design portfolio site up and running.
Increased opportunities? Yes, please.
WordPress is free, and all you’ll need is a hosting account. As far as hosting goes, I love Bluehost, cause they make it super easy with a one-click WordPress installation (no developer necessary). Then all you have to do is pick a theme and you’re off to the races! Here’s a step-by-step breakdown on how to do that:
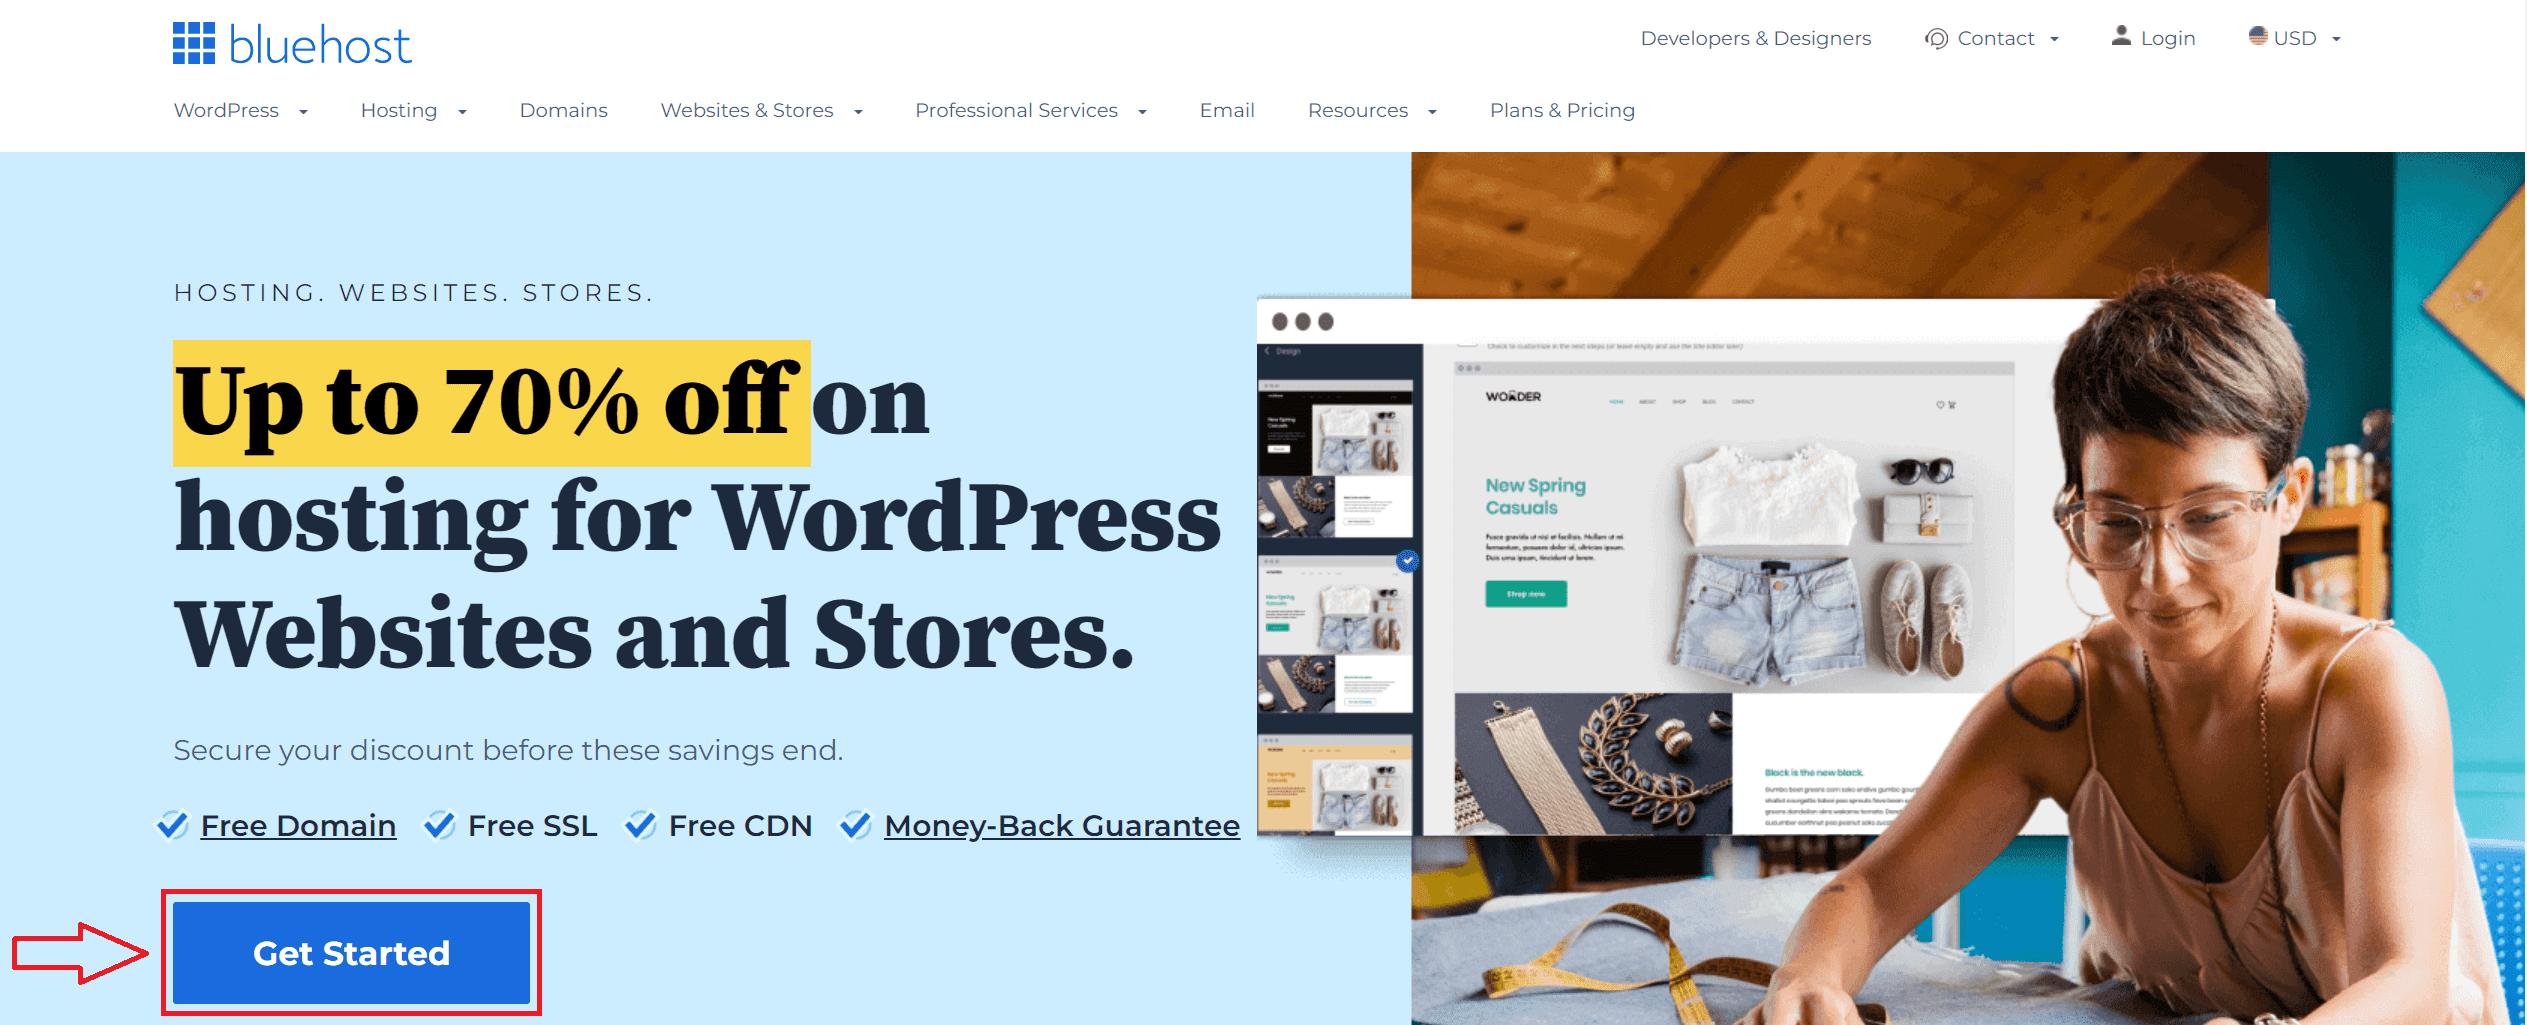
1. Get online with web hosting
The first step is to select web hosting, which allows you to create a website online.
Bluehost is great because it offers WordPress websites, and WordPress is my favorite content platform, hands down.
It’s great because it means you can: 1) Setup a creative website quickly and easily by using a WordPress “theme” without the need for any code, and 2) If you ever want to blog in the future, you can do so super easily.
They’ve been around since 2003 and they currently power 60% of sites on the web.
—> Click here to head on over to Bluehost and click the blue “Get Started” button.
2. Choose your hosting plan
On the next page, select your hosting plan:
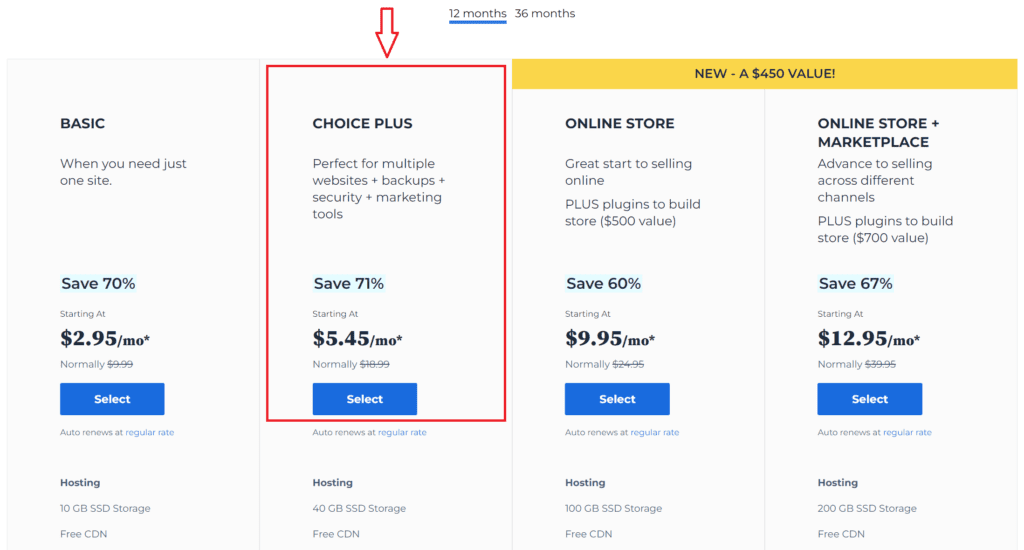
I’d recommend the Choice Plus plan, mainly because it comes with Privacy Protection which means that it protects your personal info from being published online.
Regardless of which plan you choose, it’s a great deal for a starter website!
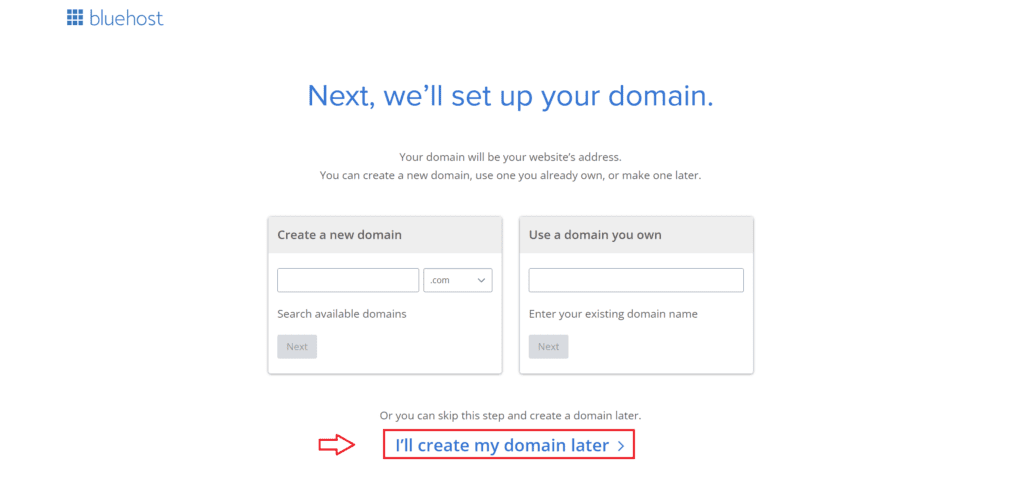
3. Choose a domain name – or skip it for now
Next, it’s time to either choose your domain name or skip on to the next step.
Personally, I’d recommend selecting the option I’ll create my domain later so that you can have some time to think about it.
This way, you can set up the other steps in the meantime.
4. Create your account for Bluehost & choose your hosting package
You can fill out your relevant details such as name and email address.
Next, there will be a spot where you can choose your hosting package (you can choose whichever one you want). They are annual plans, and even with annual, you end up saving quite a bit of money compared to other hosts.
Under the “Package Extras” section, you can feel free to unselect the extras because they aren’t super necessary in the beginning:
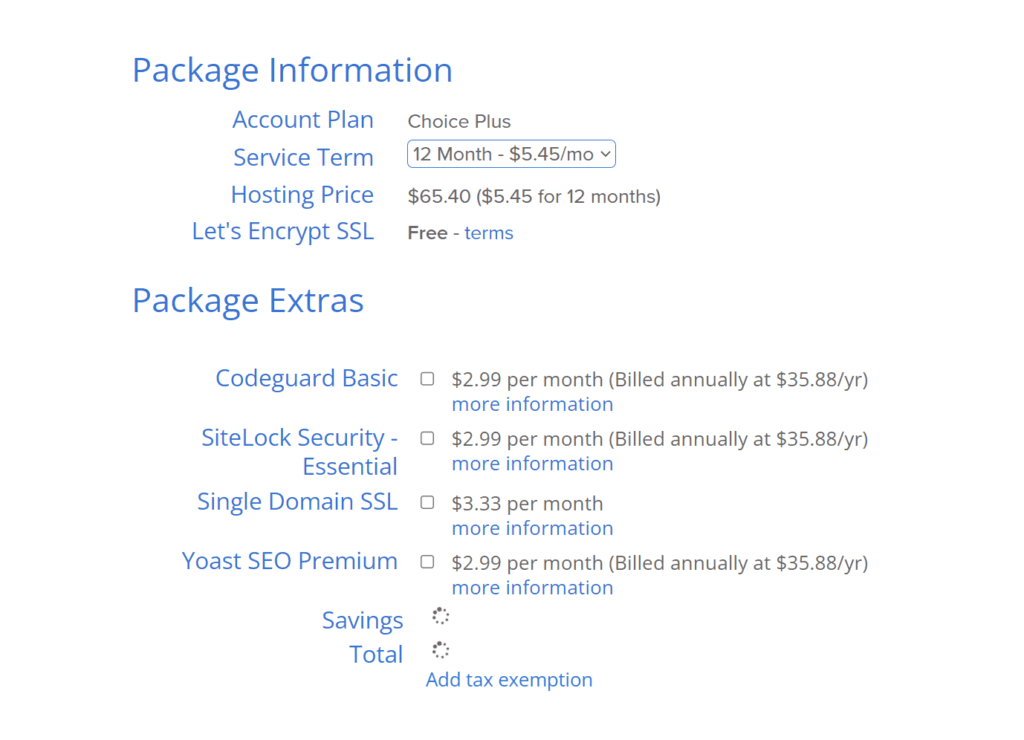
The total will be the amount you will pay today, and keep in mind that you won’t have to pay again for another one, two, three, or five years (depending on the plan you selected).
5. Type in your billing details
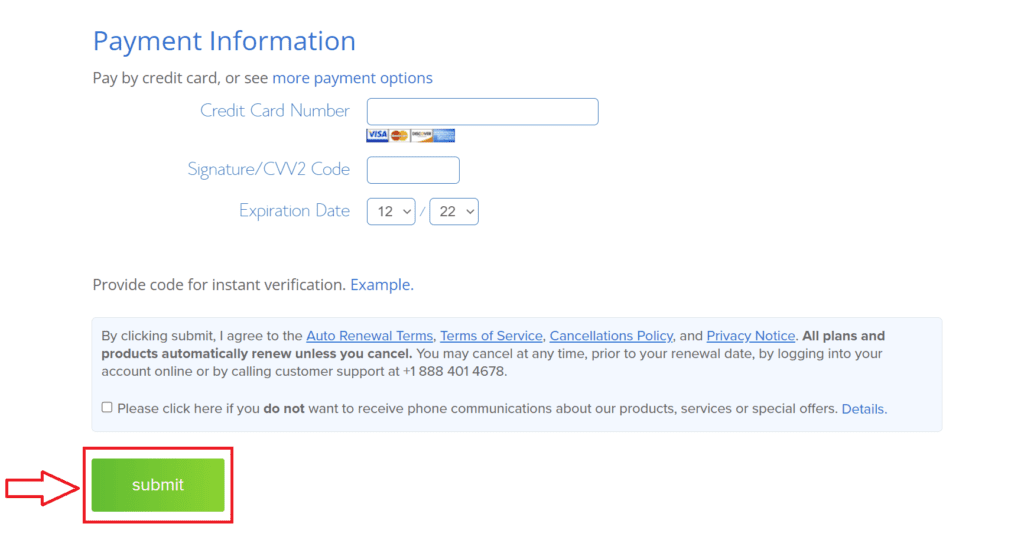
After that, you’ll fill out your billing details and click the “Submit” button.
Whoo! You did it. 🎉
Now, whenever you’ve decided on a domain name (if you haven’t already), you can head back over to Bluehost and do that.
—> Click here to head on over to Bluehost if you haven’t already registered your domain name yet.
Next steps
Congrats on finishing the installation process!
Next, enable WordPress in Bluehost. After that, select your theme and start inputting your content. I’d recommend searching for a portfolio theme.
Once you’ve chosen your theme, it’s time to think strategy: What should the look and feel be?
For tips on how to structure your portfolio website, check out this article.
Disclosure: When you purchase Bluehost hosting using my link, I receive a small part, which helps me bring content like this to you totally free. And I never recommend companies that I don’t personally love.